Saturday, January 31, 2015

The Great Ham Invasion of 2014

 A few months back my husband and I found ourselves with a lot of ham lunch meat that needed to be used before it went bad. When I say a lot, I mean a lot. We probably had about 10 pounds of it, and between two people, you have to get creative. We got to the point where we just couldn't bear to eat any more sandwiches, or omelettes. So in desperate need to eat something else while still using the ham, I hit the recipe books. That's when I found this gem.
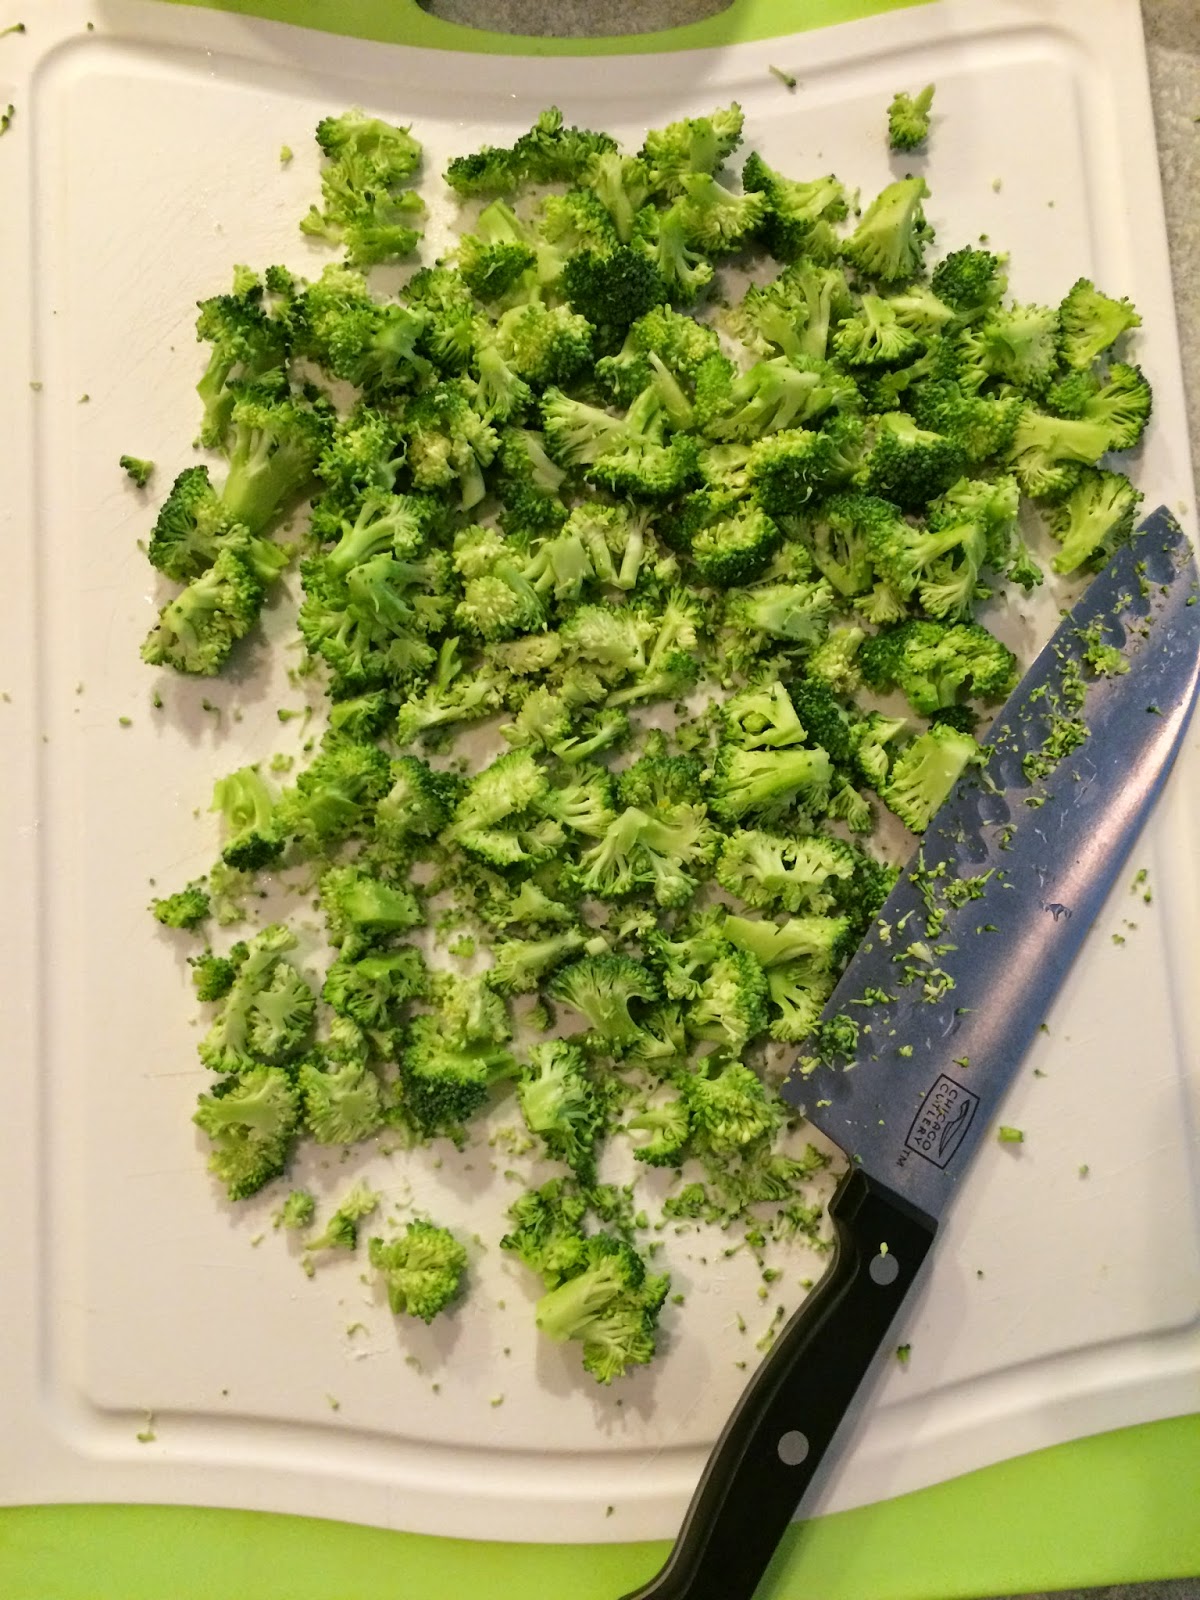
 The recipe also calls for broccoli. Now, my husband isn't the biggest fan of broccoli, but in this recipe, he doesn't mind it. This coming from the guy that comes into the kitchen when I'm making vegetable chowder just so he can eat as much broccoli off the cutting board as he can because in his words, "then there will be less in the soup." I sincerely hope that you never find yourself in the same ham predicament that we were in, but in case you have some ham you're needing to use up, you came to the right place.
Also, I would just like it to be known that even after The Great Ham Invasion of 2014, I went out and bought ham, just so I could make these again.


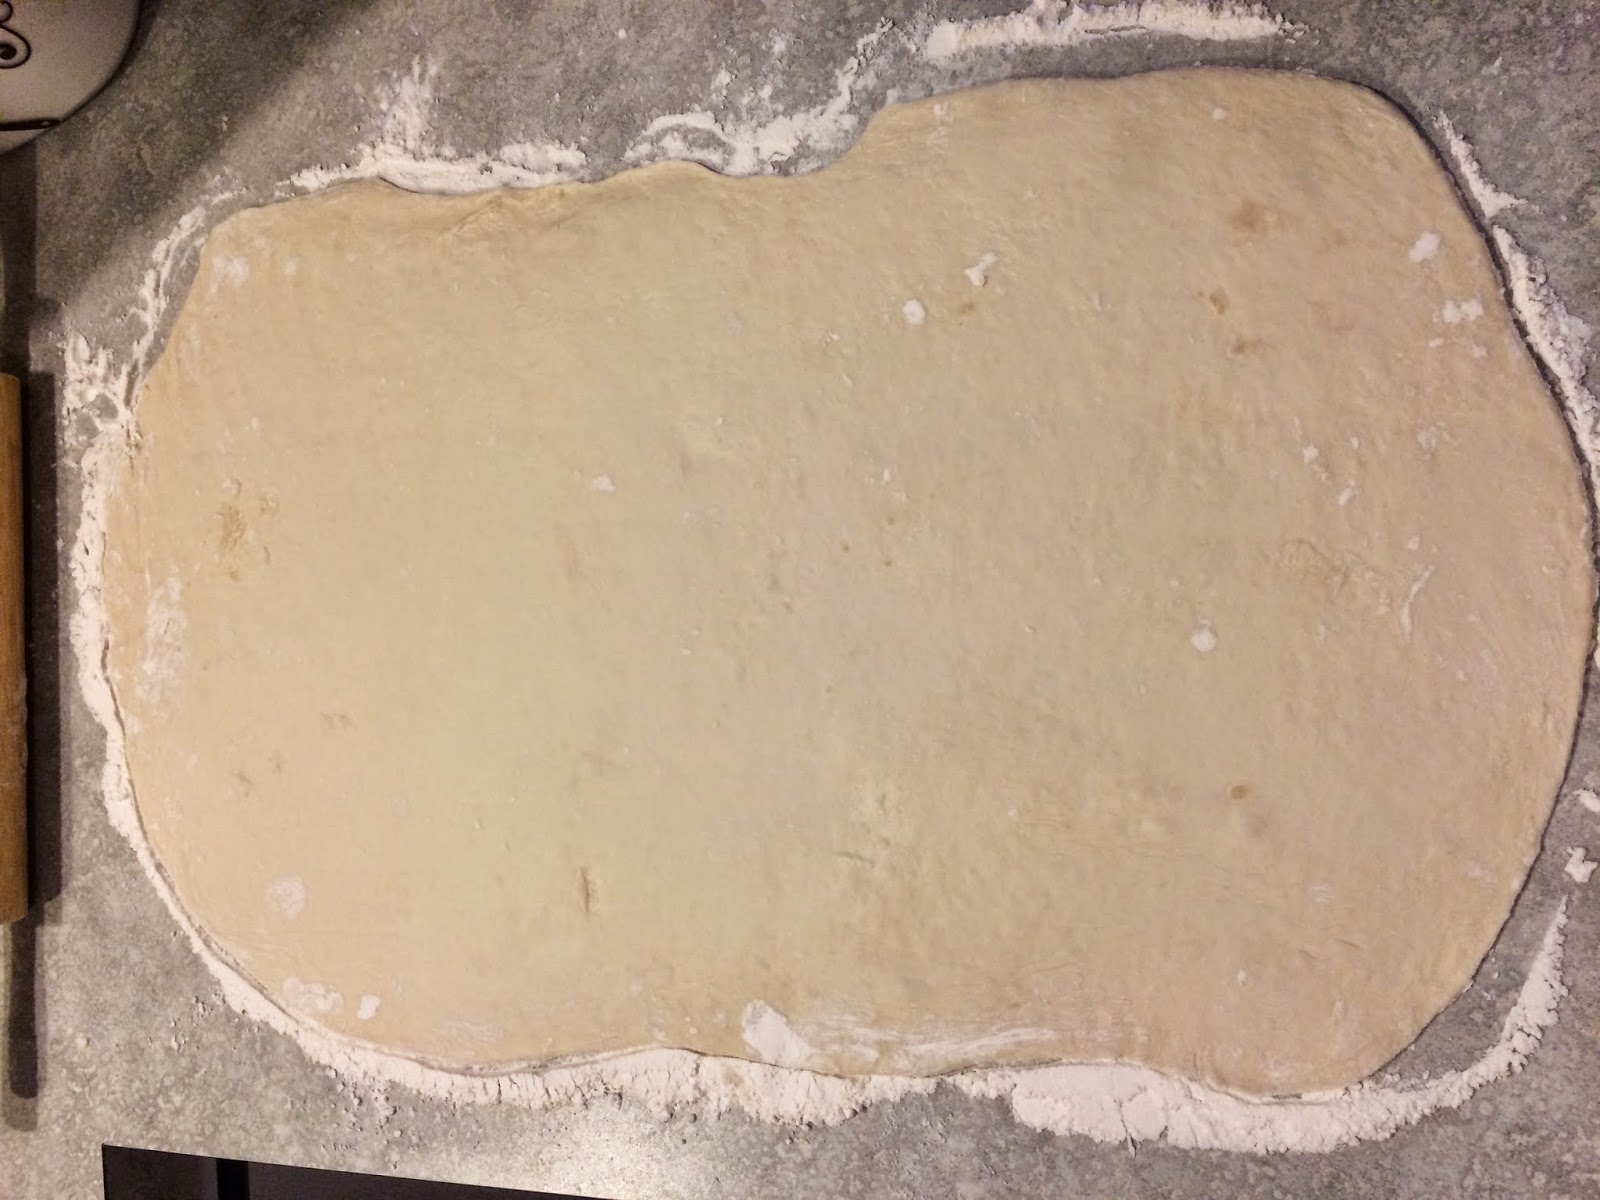
For the dough I always use my favorite pizza dough recipe. It is so easy and so versatile that I end up using this dough in some recipe or another at least once a week. Roll your dough out onto a floured surface into a large rectangle. The more precise the rectangle, the better the rolls. You really don't want to dough to be too thick because once it's stuffed and rolled, it gets pretty bulky. Cream together your cream cheese and butter, then spread evenly on pizza dough.
 Chop up your broccoli very finely. I actually chopped it more than what is pictured here, I just forgot to photograph that. Can you tell the broccoli thief didn't strike this time? Spread the broccoli on top of your cream cheese covered dough, then chop your ham up and spread that on also.

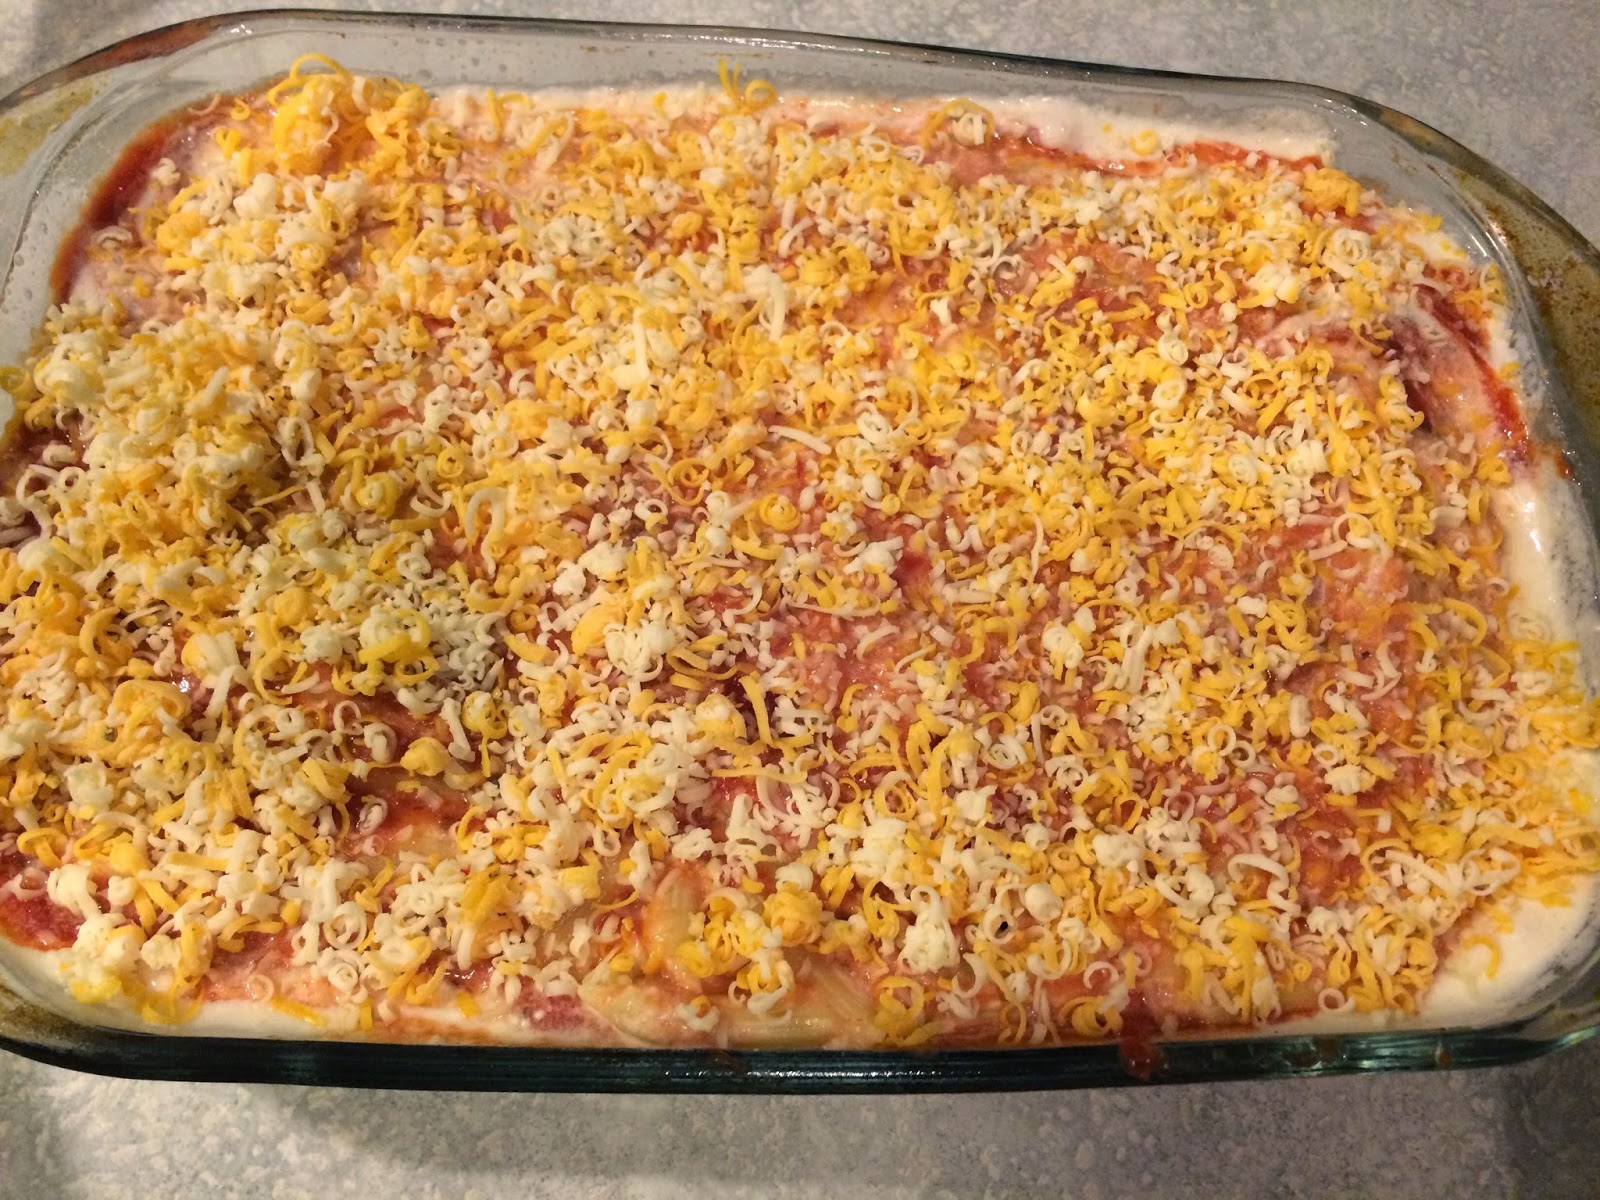
 If you've read any of my other recipe posts, you know I'm a a big fan of cheese, so here comes the fun part. Sprinkle on enough shredded cheese, and grated Parmesan cheese for your liking. The original recipe I used called for 1/4 cup Parmesan, but I'll be honest, I've never bothered to measure it. I just go cheese crazy and sprinkle away until I can hardly see any of the cream cheese below. Notice how pretty and colorful it looks once you add the shredded cheese.

 Once you have your dough sufficiently covered in cheese and other toppings carefully begin to roll it, cinnamon roll style. It helps to have very floury hands during this step to keep the dough from tearing. If this picture were the end result, I'd be embarrassed. Well, that's not entirely true, it's not the end result and I'm still embarrassed. Don't worry, they get prettier.
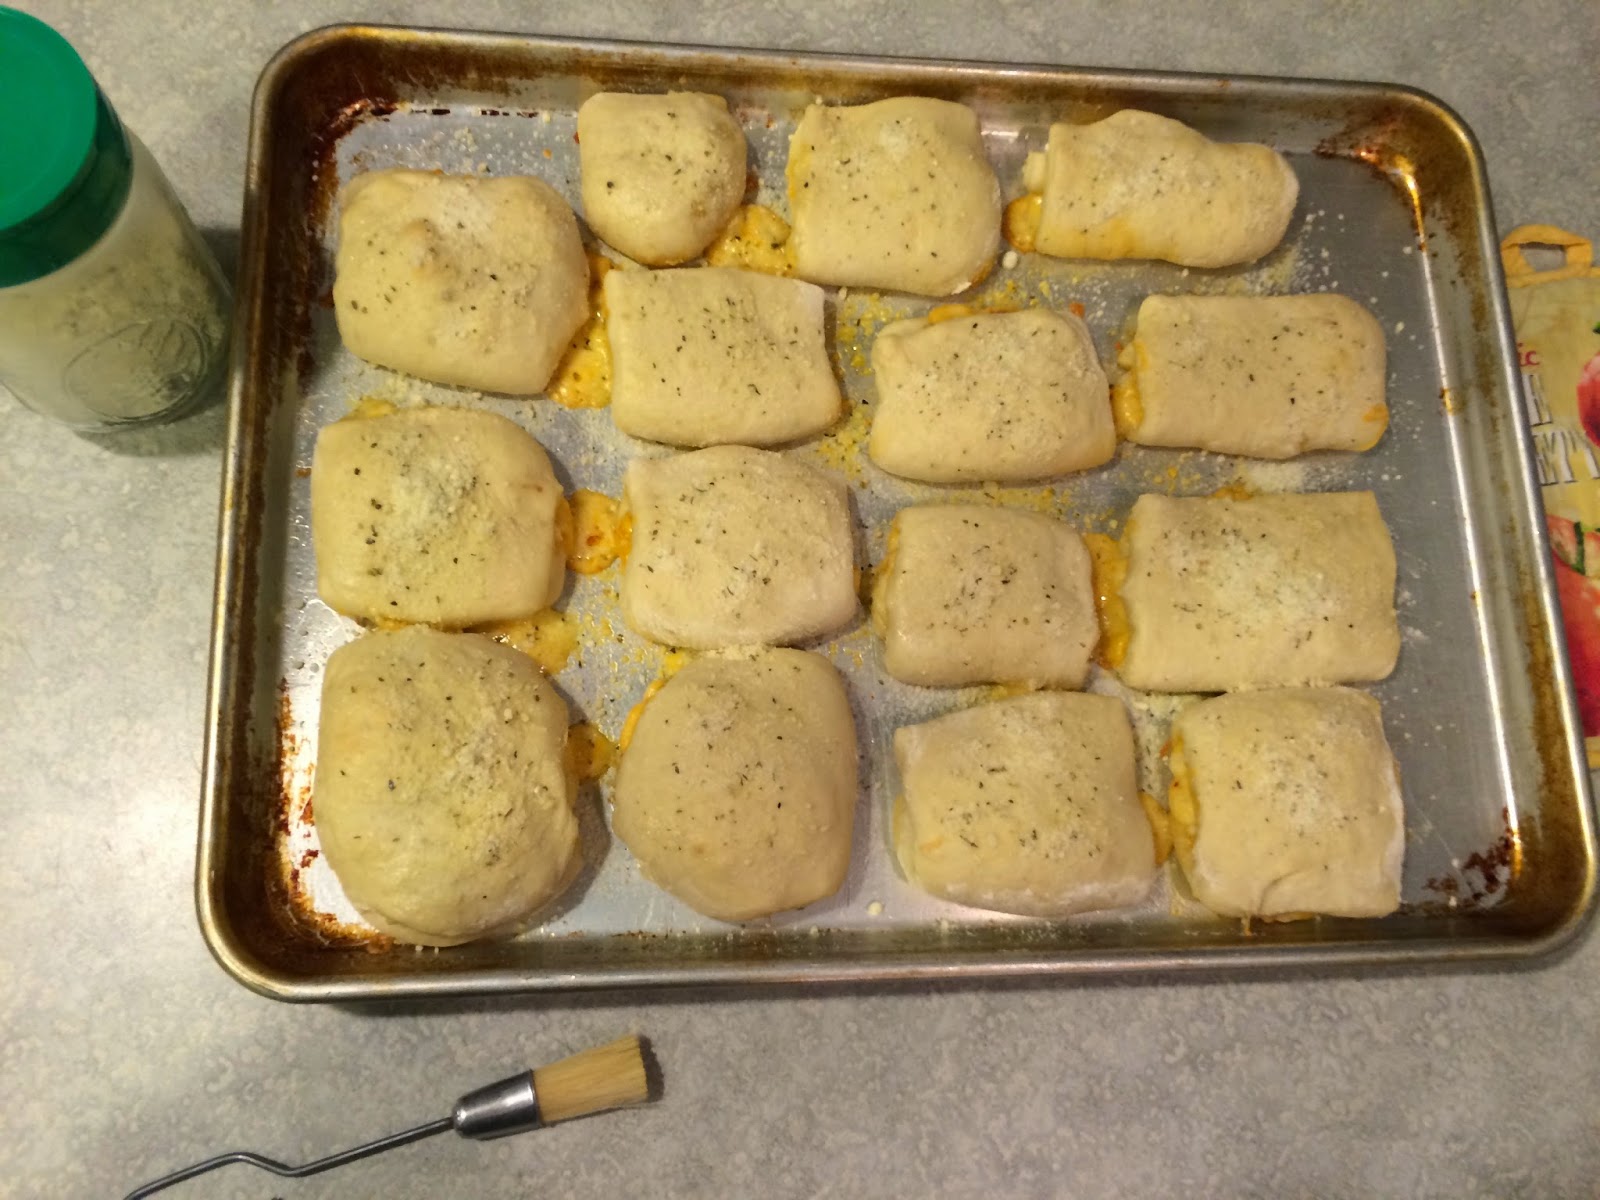
 The spirals can really fall apart at this point when you cut them up. Use a tall, sharp knife and cut quickly. Place spirals on a greased baking sheet. See? Prettier already. Bake at 350 for about 20 minutes.


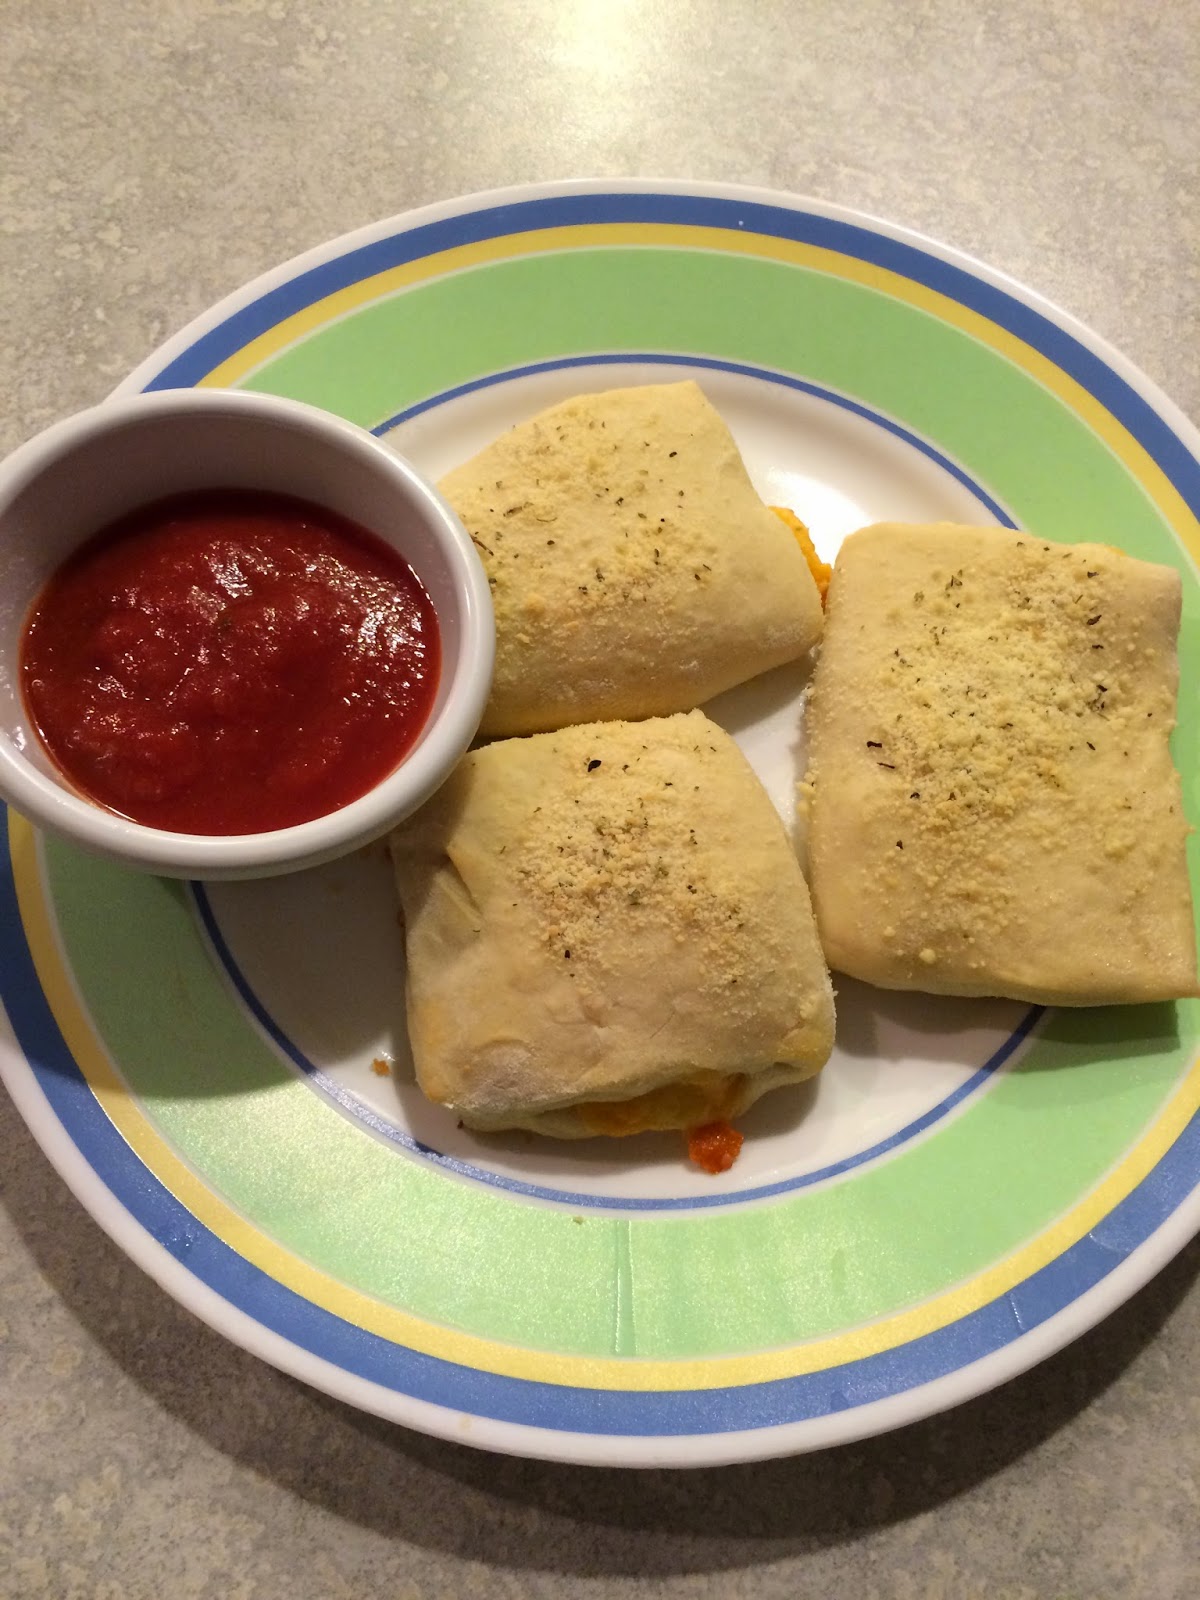
 I love the looks of these when they come out of the oven, all that colorful cheesy goodness, hot, fresh and ready to be devoured. I won't even tell you how many of these I ate the other night for dinner. You'd be embarrassed for me.

Ham Spiral Rolls

Dough ingredients:
1 1/2 cups warm water
1 Tablespoon sugar
1 Tablespoon dry yeast
1 Tablespoon oil
1 1/2 teaspoon salt
3 1/2 to 4 cups flour

Toppings:
1 (8 ounce) package cream cheese, softened
3 Tablespoons butter, softened
1 cup chopped ham
3/4 cup finely chopped broccoli
1 1/2 cups shredded cheese
1/2 cup Parmesan cheese

Preheat oven to 350 degrees. Mix all dough ingredients together until dough is easy to work with and not too sticky. Roll dough out onto floured surface into large rectangle. Cream together cream cheese and butter, then spread evenly on dough. Top with broccoli and ham. Sprinkle on shredded cheese and grated Parmesan. Roll dough up cinnamon roll style. Pinch seams together. Cut into 1 1/2 inch slices and place on greased cookie sheet. Bake for about 20 minutes.

Recipe adapted from Life in the Lofthouse

Friday, January 30, 2015

Calling All Pasta Lovers

Do you love an easy to prepare meal? Do you love pasta? Do you love Olive Garden? Do you love their Five Cheese Ziti al Forno? If you answered yes to any of these questions, this recipe is one you'll love. Red and White pasta has become a weeknight favorite at my house. I found this while scrolling through the recipe index on Life in the Lofthouse. This index is amazing. I have found so many great recipes on her site, not one of them was something I regretted making.

When I came across this recipe I was skeptical of it at first. It was so simple though, that I figured I might as well give it a shot. It calls for a jar of store-bought Alfredo sauce, but since I have a favorite Alfredo recipe of my own, I decided to make my sauce to use instead.

After making this, I realized how similar it was to Olive Garden's Five Cheese Ziti al Forno. Since the homemade Alfredo sauce uses cream cheese and Parmesan cheese, you can create a four or five cheese pasta dish by using a variety of shredded cheese for topping, such as cheddar, pepper jack, and mozzarella.
Bring water to boil in a large pot and add 16 ounces of penne noodles. Cook according to package directions and drain. Meanwhile in medium size pot, melt 1 cube of butter. When the butter is melted add in the cream cheese and garlic powder and whisk out lumps. Pour in the two cups of milk, while stirring, then add the Parmesan cheese. Once smooth, add seasonings. I love to throw in a little bit of crushed red pepper flakes to give the Alfredo a little kick.


Spray the bottom and sides of a 9x13 baking dish and pour about 1/2 a cup of spaghetti sauce on the bottom and spread it evenly. Then add half of the noodles and half of the Alfredo. Cover with a layer of cheese, then repeat the process until sauce and noodles are gone.


Try to spread each layer as evenly as you can so the sauces mix together well during baking. Add cheese to cover top layer. If you'd prefer to just use mozzarella you can definitely do that. Cover the dish with aluminum foil and bake for 30 minutes or until hot and bubbling.
It was bubbling crazily when it came out. This pasta dish tends to be pretty messy, so I suggest serving it in bowls, rather than plates. Unless you have those fancy pasta plates that are pretty nifty, in that case I suggest using those since they are pasta plates and this is after all a pasta dish. 
Enjoy while hot and fresh, just don't burn your mouth. That hurts!

Red and White Pasta

1 (16 ounce) package penne pasta
1 (24 ounce) jar of meatless spaghetti sauce
1 cube butter
1 (8 ounce) package of cream cheese
2 teaspoons garlic powder
2 cups milk
6 ounces grated Parmesan cheese
1/8 teaspoon blacker pepper
   parsley and crushed red pepper flakes to taste
2 cups shredded cheese

Cook entire package of pasta according to package directions and drain. Meanwhile melt the butter over medium high heat. Add 1 package of cream cheese and 2 teaspoons of garlic powder stirring to smooth out lumps. Add milk slowly, whisking until smooth. Add Parmesan, pepper and other spices as desired. 

Preheat oven to 375 degrees. Spray a 9x13 baking dish. Cover bottom of dish with 1/2 cup spaghetti sauce. Pour in half of noodles and half of Alfredo sauce. Then pour in half of what's left of spaghetti sauce, cover with 1 cup shredded cheese. Then repeat with remaining noodles, Alfredo, then spaghetti. Sprinkle remaining shredded cheese on top. Cover with foil and bake for 30 minutes or until hot and bubbling.  

Recipe adapted from Life in the Lofthouse

Thursday, January 29, 2015

Pizza Pockets or Pizza Rolls?

Call them whatever you'd like. At my house they're pizza rolls. I don't know why we call them that, since they aren't rolled at all, maybe it's because once they're cooked they look like a roll. If you're a fan of pizza, or even cheesy bread sticks, this is a fast and yummy twist on regular pizza. 

It might take a little longer than you would like it to when you make these for the first time, but I've found that once you're more familiar with the recipe and you get a system down, they'll be another thing you and your family will love to throw together.        

After hearing about a recipe similar to this, I decided I would create my own since I couldn't find the recipe I had heard about. The sauce isn't baked inside these little beauties, that makes the rolls perfect for dipping. We've dipped them in our favorite pizza sauce, marinara sauce, and ranch dressing. Next time I might even put Alfredo sauce to the test. 
Roll out your pizza dough into a nice rectangle. I spent extra time making this one look much better than it usually looks when I do this step.
 Use a pizza cutter to cut the dough into squares. Make them whatever size you want and make however many you want. If they are bigger you can fit more toppings, but they may take longer to bake. My husband usually has me load these up with lots of cheese, then I throw a few slices of pepperoni on each. Those are the only ingredients I have done, but why not get creative and throw some more toppings in there? Fold the rolls up and place them on a greased baking sheet.

 One neat trick I learned is that most lids from a Parmesan cheese bottle will fit on a mason jar. This is especially handy when I make pizza, pizza rolls, and bread sticks. This little guy is always in my fridge. He's a mixture of Parmesan cheese, garlic powder, and Italian seasoning. 


 During the last few minutes of baking I pull the pan of rolls out and brush them with butter, then sprinkle them with this mixture. Putting the pan back into the oven for another few minutes gives the rolls a nice toastiness on top. 

 Depending on the size and thickness of your rolls, baking time will vary. Sometimes when I make these, the bottoms brown faster than the tops, so keep an eye on that because you don't want these to turn out too crunchy. They are much better when they are still a little bit soft.

Pepperoni Pizza Rolls

Dough ingredients:
1 1/2 cups warm water
1 Tablespoon sugar
1 Tablespoon dry yeast
1 Tablespoon oil
1 1/2 teaspoon salt
3 1/2 to 4 cups flour
   
Topping ingredients:
   shredded cheese
   pepperoni
  additional toppings
  butter (to brush on tops)
  Parmesan cheese, garlic powder, Italian seasoning to taste

Preheat oven to 400 degrees. Mix all ingredients together, making dough so it is easy to work with but not sticky. Roll dough out into large rectangle on floured surface. Cut into squares. Top each square with shredded cheese, pepperoni, and additional toppings. Fold up and pinch edges shut. Place on greased baking sheet. Bake for about 15 minutes, depending on size and thickness of rolls. Keep an eye on rolls throughout baking to make sure they aren't getting too brown. During last few minutes of baking brush on melted butter and sprinkle with (mixture of) Parmesan cheese, garlic powder, and Italian seasoning. Serve with pizza sauce, marinara, or ranch for dipping.

Wednesday, January 28, 2015

Barbecue Beef Cups

"Beef. It's what's for dinner." 

More specifically, barbecue beef, in a biscuit,  then covered in cheese.


That's it folks. That's really it, and it's perfection. The original recipe calls for canned biscuits, but I try to be a homemade person when it's easy enough to make it myself rather than buying it. It used to be easier for me to use store-bought biscuits, but after making my grandma's mile-high baking powder biscuits enough times, they're just as easy to whip up, especially if you don't have store-bought biscuits on hand.
This recipe is honestly so easy and so worth it. You brown a pound of ground beef, dump in a cup of cheese and a cup of barbecue sauce. You flatten out some biscuit dough and fit it in muffin cups, then fill them with the beef mixture and top with even more cheese. What makes this even better, is that they only take 10 minutes in the oven. Winner winner, beef dinner.

Whip up a batch of baking powder biscuits, and cut them out using a nifty cutter, or the rim of a glass. Flatten out the biscuits so they fit into a muffin tin while your ground beef is browning. For easy removal I suggest spraying the muffin tin with non-stick cooking spray.

Sometimes ground beef literally makes me gag when the fat isn't drained and it's just left to soak into the meat. So when I brown the beef I always tilt my pan to one side and use a paper towel (or two or three) to soak up the excess grease. 


Once the beef is cooked through, add a cup of your favorite barbecue sauce. I HIGHLY recommend using Sweet Baby Ray's original sauce. I have made these using a cheaper version of barbecue sauce and the end result just wasn't the same. If however, you have a different barbecue sauce you and your family love, maybe you will like that the best. 
Now, the original recipe only calls for topping the beef cups with cheese, but since my philosophy is that more cheese is always better, I not only top the cups with cheese, but mix in a cup of cheese as well.

 If you have a large cookie scoop or something similar, it makes for easy scooping into the biscuit cups. The original recipe says that you may have some meat leftover once you fill the cups. To me that seems like such a waste. However, by using my own biscuit dough in this recipe I'm able to make more than 12 cups and none of the meat goes to waste.  
After topping these generously with cheese, bake in the oven for 10-12 minutes at 375 degrees.

Barbecue Beef Cups

1 lb ground beef
1 cup shredded cheese
1 cup Sweet Baby Ray's Barbecue Sauce
   shredded cheese for topping

For Biscuits:

2 cups flour
2 tablespoons sugar
4 teaspoons baking powder
1/2 teaspoon cream of tartar
1/2 cup butter, margarine, or shortening
1 egg beaten
2/3 cup milk

Sift dry ingredients. Add shortening and blend. Mix milk and egg into flour mixture until mixed. Roll 3/4 inch thick. Cut with cutter. Flatten biscuits into muffin tin. Makes about 18 cups.
Brown ground beef and drain. Once ground beef is cooked, add 1 cup barbecue sauce and 1 cup shredded cheese. Heat through and until cheese is melted. Preheat oven to 375 degrees. Fill cups with beef mixture. Top generously with shredded cheese. Bake for 10-12 minutes. Enjoy while warm. These make great next-day leftovers and also freeze well. 

*This recipe has been adapted from http://life-in-the-lofthouse.com/barbecue-cups/


Tuesday, January 27, 2015

Not So Sloppy Joes

Normally I'm not the biggest fan of sloppy joes. I liked them every now and then, until I found these. Before I found this recipe, I had only made sloppy joes using a store bought seasoning packet that called for water and tomato paste. Well my friends, these are so much better. Now, remember what I said about not being a professional photographer? This post will definitely remind you of that. Despite how the food may look in the photos, it's delicious. Last time I made these, I also made the hamburger buns. I seriously hate running to the store for just one thing, and hamburger buns were never something I had on hand. Luckily, I found this recipe for easy buns in the same book that this sloppy joe recipe came from. I'll share them both.

Not So Sloppy Joes and Easy Hamburger Buns

Don't mind the crumbs on the plate. I had already eaten my first joe, and almost forgot to photograph the finished product. The crumbs are just proof of the yumminess awaiting you when you dive into your joes.
When I made this recipe for the first time, my husband and I both felt like the sloppy joes weren't quite sloppy enough. They were delicious, but the amount of sauciness reminded me more of seasoned ground beef used in tacos rather than the typical sloppy joe. The next time I made these, I decided to 1 and 1/2 the amount of ingredients but to keep the meat ratio the same. The result... genius.


I don't have pictures of the hamburger buns being made because I didn't plan on including them in this post, but since they turned out so good, I had to. Funny story, when I first made the buns, I halved the recipe because it was going to make  12-15 buns and I didn't need that many. I was skeptical as to how they would turn out. It ended up making 8 buns once I halved it. My husband absolutely loved these buns. He told me he was pretty sure he never wanted me to buy store-bought buns again. My first thought was "Oh no, what have I done?" Then I bit into a bun for myself and I agreed. These are so easy to make and so much better than the fluff you buy at the store. Not only do these buns not go soggy as quickly, but they are more dense, yet not too dense. I ended up being a little bummed I hadn't made a full batch. I say only a little bummed because, like I said, they really are easy. However, next time I'll definitely make the full batch and freeze the leftovers for future meals. 

Brown your meat and onion until onion is tender and meat is cooked. Drain the fat. Side note, if you're not a big fan of onions you can substitute the actual onion for 1/2 teaspoon of onion powder, or sprinkle in some dried onion flakes while the meat is cooking like I do sometimes. Like my handy "ChopStir?" Get one here.

Meanwhile in small bowl whisk together all other ingredients. Now, technially the original recipe called for 5 tablespoons of ketchup. Since I one and a halved the sauce ingredients, that would mean 7 1/2 tablespoons of ketcup. I don't know about you but I most certainly don't want to waste time measuring out 7 1/2 tablespoons of ketchup. Instead I suggest using slightly less than 1/2 cup of ketchup since a 1/2 cup is equivalent to 8 tablespoons. Close enough right?

Add mixture to cooked meat and heat thoroughly. Make sure you mix it into the meat well so you won't have any dry spots in your meat. 

Serve on toasted or untoasted hamburger buns. 


Sloppy Joes

1 lb ground beef
1 medium onion, chopped, or 1/2 tsp. onion powder
1/2 cup ketchup (slightly less)
3/4 teaspoon garlic powder
3 teaspoons brown sugar
1/4 teaspoon lemon juice
1 1/2 Tablespoons Worcestershire sauce
3/4 teaspoon salt
6 hamburger buns

Brown your meat and onion until onion is tender and meat is cooked. Drain the fat. Meanwhile in small bowl whisk together all other ingredients. Add mixture to cooked meat and heat thoroughly. Serve on toasted or untoasted hamburger buns. 

Easy Hamburger Buns

5-6 cups flour
2 pkgs. or 2 Tablespoons yeast
1 cup milk
3/4 cup water
1/2 cup oil
1/4 cup sugar
1 Tablespoon salt
    butter or margarine melted to brush on tops

Stir together 2 cups flour and yeast. In a saucepan on medium, heat milk, water, oil, sugar and salt to very warm (120-130 degrees). Add liquid all at once to flour mixture. beat until smooth (about 3 minutes) on medium speed with an electric mixer or 300 strokes by hand. Add enough additional flour to make a soft dough; mix well. Let rest 10 minutes. roll out on well floured surface to 1/2 inch thickness. Cut with 3 inch round cutter, coffee can, or the rim of a glass. Place rounds on greased baking sheet. Let rise in a warm place (80 degrees) for 30 minutes. Preheat oven to 425 degrees and bake for 12-15 minutes or until lightly browned. Brush melted butter or margarine on tops while still warm. Slice in half. Makes 12-15 buns.

These recipes appear in Dining on a Dime Cook Book. Sloppy Joe recipe has been adapted. Purchase your own Dining on a Dime Cook Book here. Visit www.livingonadime.com.

Monday, January 26, 2015

Never Make Boxed Mac and Cheese Again

Easy Peasy Mac and Cheesy

Seriously, this recipe has pretty much convinced me to not ever buy boxed macaroni and cheese again. It is that much better. This easy peasy mac and cheesy recipe is one of my favorites to whip up on a busy (or lazy) weeknight. It's delicious and is probably a lot healthier for you than the processed stuff.

First off, let me just say, I am not a professional food photographer, or even a professional photographer, neither am I a professional or trained chef. I'm just a girl who loves the satisfaction of making and eating something delicious. That said, my food photos are not going to be beautifully arranged and perfectly garnished. Since I have a seven-month-old tot in tow and a husband who works full-time and goes to school... I'll just say, "ain't nobody got time for that." I promise I'll do my best to make the food presentable, but when my photos fall short, remember that I wouldn't be sharing the recipe if it wasn't delicious, no matter the quality of photo. 

Creamy Mac and Cheese 

Gather up your ingredients. Luckily this recipe is one of those that only calls for things that I usually have on-hand. I love it when that happens. I never really had evaporated milk on-hand before I found this recipe. There were times I wanted to make this for dinner but the only thing I didn't have was a can of evaporated milk. Knowing this, I waited for it go on sale and when it did, I stocked up. Now I can pretty much make this for dinner any day I feel like it. 
Sometimes, I get really annoyed with recipes when they call for half a can of something or part of a package of that, because it seems wasteful not to use the whole thing once you've opened it. I've made this mac and cheese using the whole 16-ounce package of elbow macaroni and it didn't throw off the cheese ratio too much. However lately, I've been using most of the package and setting aside the remainder. Then after about three or four times of making the mac and cheese, I have enough leftover from each package to make another batch.

Start by bringing 3 1/2 cups of water, 1 cup of the evaporated milk, the elbow mac, and the 1/2 teaspoon of salt to a boil in large but not huge pot on high heat. Please oh please, don't forget the salt. I make this recipe often enough that I almost  have it memorized. I say almost because last week when I made it, I forgot the salt. When my husband and I took our first bites, we immediately knew something wasn't right. I scanned the recipe and realized I forgot the salt. It's crazy how much flavor it loses when the salt is omitted. Keep the noodles boiling for about 12 minutes, or until noodles are tender enough, stirring regularly.
Meanwhile in a small bowl, whisk together remaining evaporated milk, corn starch, and dry mustard. Feel free to substitute the dry mustard for prepared mustard if you don't have dry mustard. Use 1/2 TABLESPOON of prepared mustard instead of 1/2 teaspoon of dry mustard. If you're lucky like me and have a 4-cup liquid measuring cup, I suggest using that to mix these ingredients. It's perfect because you can measure the water and evaporated milk first, then use it to whisk the corn starch mixture together. It's also big enough to measure the cheese in toward the end. It helps reduce the amount of dishes you need to use and that's always a good thing. 
Add the corn starch mixture into the pot and let it thicken for another minute.  Then remove your pot from the heat. Gradually stir in the grated cheese a little at a time. If you do too much at one time it gets hard to stir in evenly and takes longer to melt. 
The original recipe calls for sharp cheddar cheese. The hubs and I aren't the biggest fans of sharp cheddar but we are HUGE fans of mild or medium cheddar mixed with pepper jack cheese. We buy our cheese from Gossner's and grate both kinds then mix them together. We like to go heavy on the pepper jack side because it gives the cheese a spicy little kick. Technically Gossner calls their pepper jack cheese hot pepper cheese, but basically it's the same thing. Since I'm the cook at our house, I always go a little heavy on the cheese measurements. In my opinion, it's nearly impossible to have such a thing as too much cheese. 
Once the cheese is stirred in, stir in the small squares of butter. If you'd like, you can season to taste with black pepper. I don't particularly care to add extra seasonings to my food most of the time, but I know a lot of people do. So go ahead, throw some on there.
Enjoy while hot and fresh!

Creamy Mac and Cheese

Ingredients:

3 1/2 cups water
1 (12 ounce) can evaporated milk
12 ounces (3 cups) elbow macaroni
1/2 teaspoon salt
1 teaspoon cornstarch
1/2 teaspoon dry mustard OR 1/2 Tablespoon prepared mustard
3 cups of shredded cheddar and pepper jack cheese
2 Tablespoons butter, cut into small squares
black pepper, season to taste

Directions: Bring 3 1/2 cups water, 1 cup evaporated milk, and salt to boil on high heat in 5 quart pot.  
 Continue to boil for about 12 minutes or until noodles are tender. Stir regularly. Meanwhile in small bowl whisk together remaining evaporated milk, corn starch and dry (or prepared) mustard. Add to pot and let thicken for another minute. Remove from heat and gradually stir in shredded cheese a little at a time. Stir until cheese is melted then stir in small squares of butter. Season with pepper. Serve immediately.

This recipe has been adapted from Life in the Lofthouse. See the original recipe here.